
Setting up your own email server can transform your business communications while providing complete control over your data and privacy.

Whether you’re a small business owner looking to establish professional email hosting or an IT professional seeking to implement a secure mail server solution, this comprehensive guide will walk you through every step of the process.
In this tutorial, you’ll learn how to configure a dedicated server setup using Ubuntu, implement proper DNS records, secure your email server, and integrate popular email clients like Outlook and Thunderbird.
Why Choose a Self-Hosted Email Server?
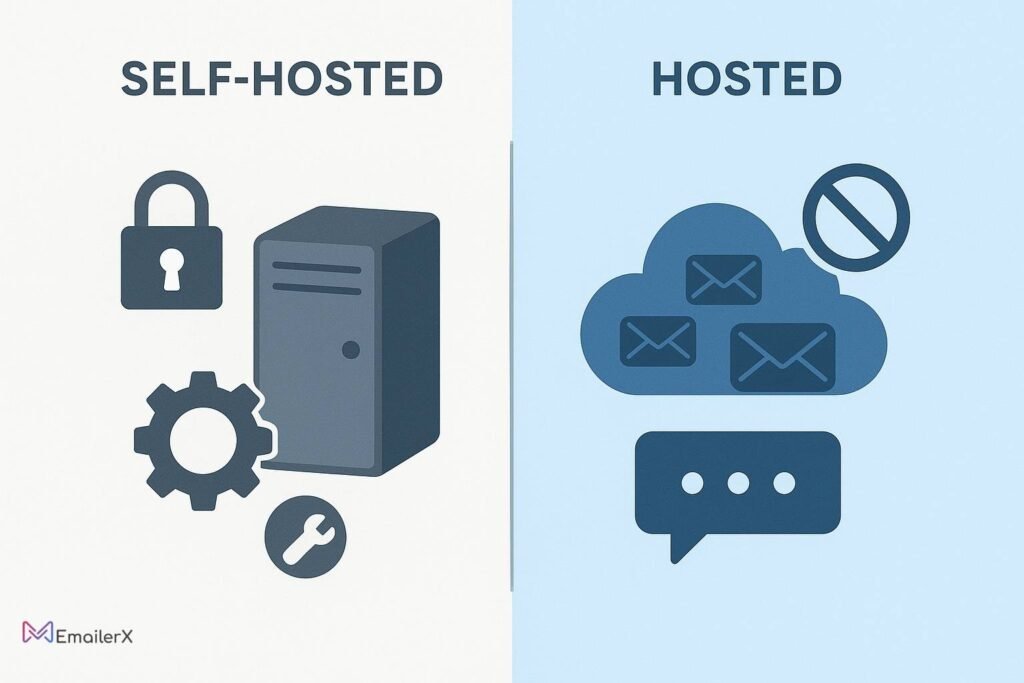
Modern businesses are increasingly turning to self-hosted email solutions to create more professional experiences and maintain control over their communications. Here are the key advantages:
Self-hosted vs Hosted Email Comparison
| Aspect | Self-Hosted Email Server | Third-Party Hosted |
| Control & Privacy | Complete data ownership | Limited control |
| Customization | Unlimited customization | Restricted features |
| Cost (Long-term) | Lower operational costs | Higher subscription fees |
| Security | Custom security measures | Standard provider security |
| Compliance | Full GDPR/HIPAA control | Dependent on provider |
Key Benefits of Your Own Email Server
- Professional Branding: Use your custom domain email setup
- Enhanced Privacy: Keep sensitive communications on your own infrastructure
- Cost Efficiency: Reduce long-term email hosting expenses
- Unlimited Storage: No restrictions on email storage management
- Advanced Features: Implement custom email forwarding and autoresponders
- Business Continuity: Full control over uptime and availability
Prerequisites and Requirements
Before starting your email server deployment, ensure you have:
Hardware Requirements
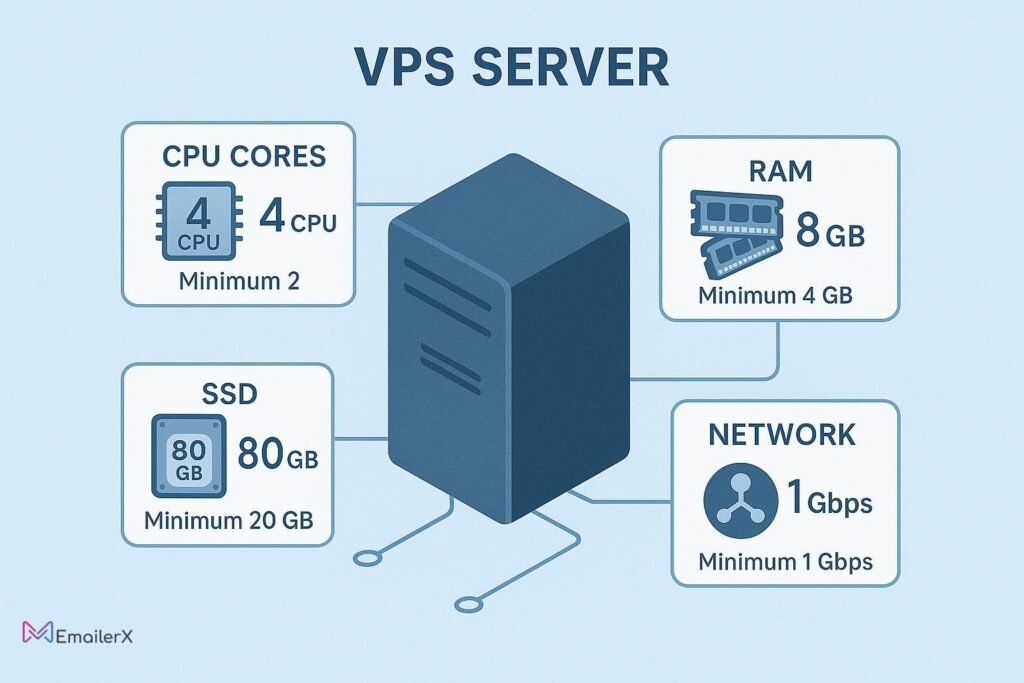
- VPS or Dedicated Server: Minimum 2GB RAM, 20GB storage
- Static IP Address: Essential for proper email delivery
- Domain Name: For your custom email hosting
- Root Access: Administrative privileges on your server
Recommended Server Specifications
- CPU: 2+ cores for optimal SMTP server setup
- RAM: 4GB+ for handling multiple concurrent connections
- Storage: SSD preferred for faster IMAP server configuration
- Bandwidth: Unmetered for business email server operations
Popular VPS Providers for Email Hosting
Consider these reliable options for your Ubuntu email server:
- DigitalOcean: Starting at $5/month with excellent documentation
- Linode: Robust infrastructure with 99.9% uptime
- Vultr: High-performance SSD VPS options
- AWS EC2: Enterprise-grade solutions with global reach
Ubuntu Server Configuration {#ubuntu-config}
Let’s begin with the Ubuntu server configuration process. This section covers the essential steps to prepare your server for email hosting.
Step 1: Initial Server Setup
# Update system packages
sudo apt update && sudo apt upgrade -y

# Set up proper hostname
sudo hostnamectl set-hostname mail.yourdomain.com

# Install essential packages
sudo apt install -y curl wget nano ufw fail2ban
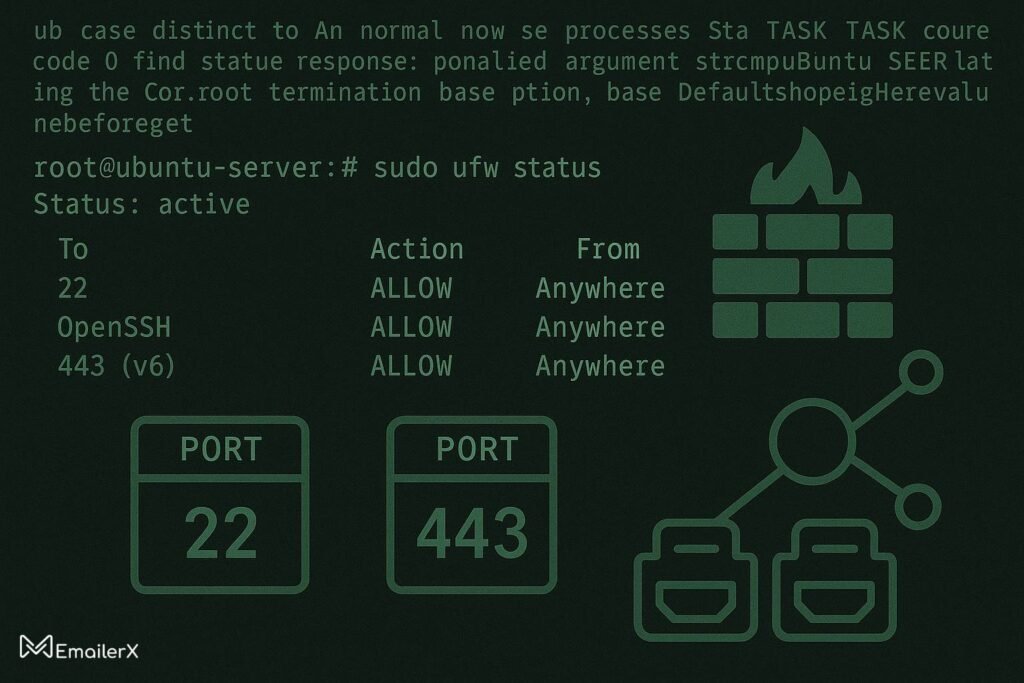
Step 2: Configure Firewall
# Enable UFW firewall
sudo ufw enable

# Open essential email ports
sudo ufw allow 22      # SSH
sudo ufw allow 25      # SMTP
sudo ufw allow 80      # HTTP
sudo ufw allow 110     # POP3
sudo ufw allow 143     # IMAP
sudo ufw allow 443     # HTTPS
sudo ufw allow 465     # SMTPS
sudo ufw allow 587     # Submission
sudo ufw allow 993     # IMAPS
sudo ufw allow 995     # POP3S
Step 3: Time Synchronization
# Install and configure NTP
sudo apt install -y chrony
sudo systemctl enable chrony
sudo systemctl start chrony
Step 4: Create Mail User
# Create dedicated mail user
sudo groupadd -g 5000 vmail
sudo useradd -g vmail -u 5000 vmail -d /var/mail/vmail -m
DNS Configuration for Email {#dns-config}
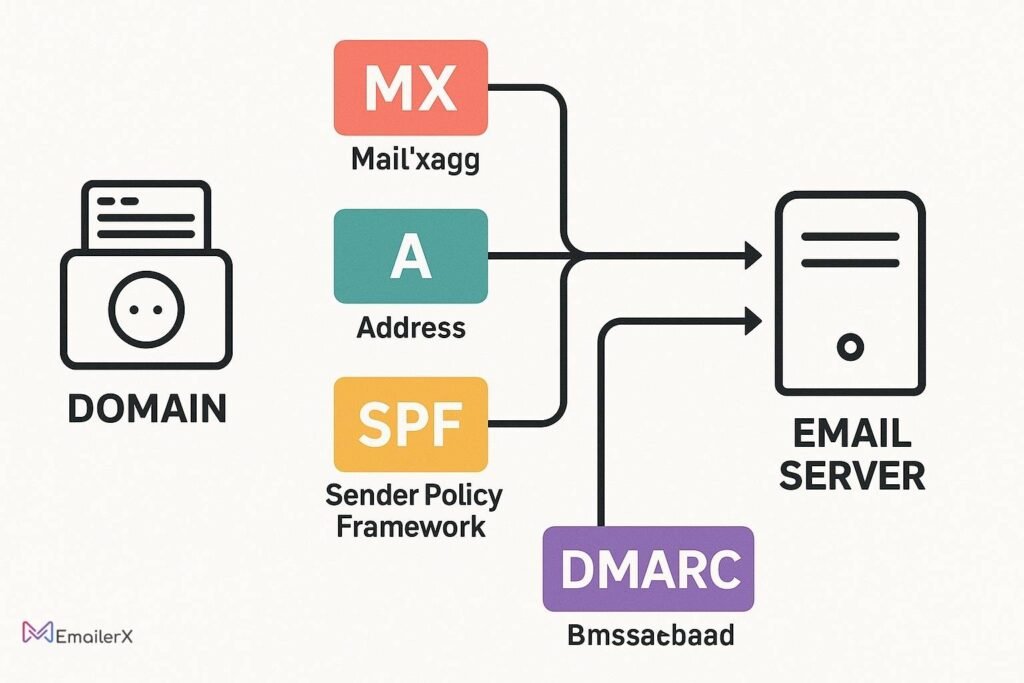
Proper DNS configuration for email is crucial for successful email delivery and security. You’ll need to configure several DNS records.
Essential DNS Records Setup
1. MX Record Configuration
Type: MX
Name: @
Value: mail.yourdomain.com
Priority: 10

2. A Record for Mail Server
Type: A
Name: mail
Value: YOUR_SERVER_IP

3. SPF Record Setup
Type: TXT
Name: @
Value: "v=spf1 mx ip4:YOUR_SERVER_IP -all"

4. DKIM Record Configuration
Type: TXT
Name: default._domainkey
Value: "v=DKIM1; k=rsa; p=YOUR_PUBLIC_KEY"

5. DMARC Record Implementation
Type: TXT
Name: _dmarc
Value: "v=DMARC1; p=quarantine; rua=mailto:dmarc@yourdomain.com"

Reverse DNS Setup
Contact your VPS provider to configure reverse DNS setup (PTR record):
YOUR_SERVER_IP → mail.yourdomain.com
Installing and Configuring Postfix

Postfix serves as our SMTP server setup component, handling outgoing mail delivery.
Step 1: Install Postfix
bash
# Install Postfix and MySQL support
sudo apt install -y postfix postfix-mysql
During installation:
Select "Internet Site"
Enter your domain name when prompted

Step 2: Configure Postfix Main Settings
Edit the main configuration file:
bash
sudo nano /etc/postfix/main.cf
Add these essential configurations:
bash
# Basic settings
myhostname = mail.yourdomain.com
mydomain = yourdomain.com
myorigin = $mydomain
inet_interfaces = all
mydestination = localhost

# Virtual domains
virtual_mailbox_domains = /etc/postfix/virtual_domains
virtual_mailbox_base = /var/mail/vmail
virtual_mailbox_maps = /etc/postfix/virtual_users
virtual_alias_maps = /etc/postfix/virtual_aliases
virtual_minimum_uid = 5000
virtual_uid_maps = static:5000
virtual_gid_maps = static:5000

# Security settings
smtpd_tls_cert_file = /etc/letsencrypt/live/mail.yourdomain.com/fullchain.pem
smtpd_tls_key_file = /etc/letsencrypt/live/mail.yourdomain.com/privkey.pem
smtpd_use_tls = yes
smtpd_tls_auth_only = yes

Step 3: Create Virtual Domain Files
bash
# Create virtual domains file
echo "yourdomain.com" | sudo tee /etc/postfix/virtual_domains

# Create virtual users file
echo "user@yourdomain.com    yourdomain.com/user/" | sudo tee /etc/postfix/virtual_users

# Create virtual aliases file
echo "admin@yourdomain.com    user@yourdomain.com" | sudo tee /etc/postfix/virtual_aliases

# Hash the files
sudo postmap /etc/postfix/virtual_users
sudo postmap /etc/postfix/virtual_aliases
Dovecot Integration
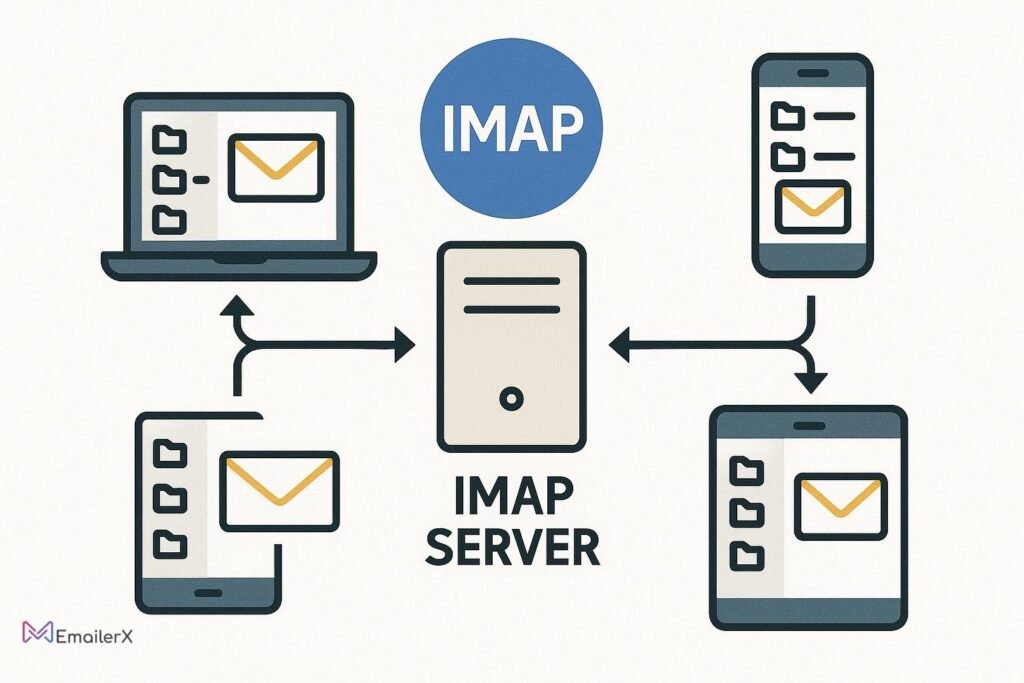
Dovecot handles IMAP server configuration and POP3 protocols for email retrieval.
Step 1: Install Dovecot
bash
sudo apt install -y dovecot-core dovecot-imapd dovecot-pop3d dovecot-lmtpd

Step 2: Configure Dovecot Authentication
bash
# Edit main configuration
sudo nano /etc/dovecot/dovecot.conf
Add:
bash
protocols = imap pop3 lmtp
listen = *

Step 3: Configure Mail Location
bash
sudo nano /etc/dovecot/conf.d/10-mail.conf
Set:
bash
mail_location = maildir:/var/mail/vmail/%d/%n
mail_privileged_group = mail
first_valid_uid = 5000
first_valid_gid = 5000

Step 4: SSL Configuration
bash
sudo nano /etc/dovecot/conf.d/10-ssl.conf
Configure:
bash
ssl = required
ssl_cert = </etc/letsencrypt/live/mail.yourdomain.com/fullchain.pem
ssl_key = </etc/letsencrypt/live/mail.yourdomain.com/privkey.pem
SSL/TLS Encryption Setup
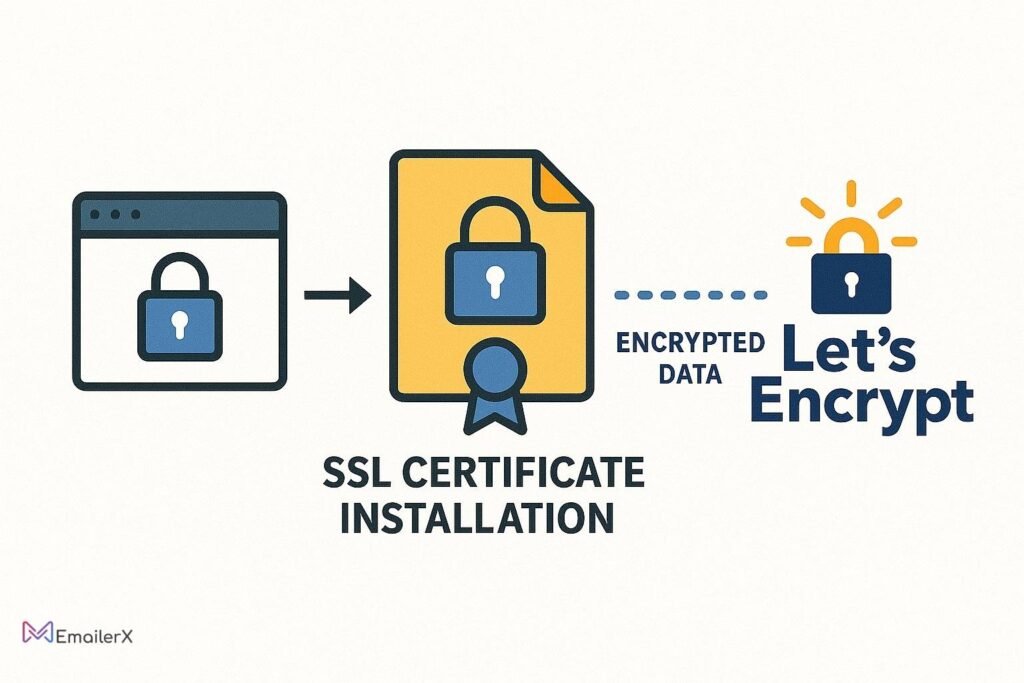
Implementing SSL/TLS encryption is essential for secure email communications.
Step 1: Install Certbot
bash
sudo apt install -y certbot

Step 2: Obtain SSL Certificates
bash
# Get Let's Encrypt certificate
sudo certbot certonly --standalone -d mail.yourdomain.com

Step 3: Configure Auto-Renewal
bash
# Test renewal
sudo certbot renew --dry-run

# Add to crontab
echo "0 12 * * * /usr/bin/certbot renew --quiet" | sudo crontab -

Step 4: Configure Certificate Permissions
bash
sudo chmod 600 /etc/letsencrypt/live/mail.yourdomain.com/privkey.pem
sudo chown root:root /etc/letsencrypt/live/mail.yourdomain.com/privkey.pem
Email Client Integration
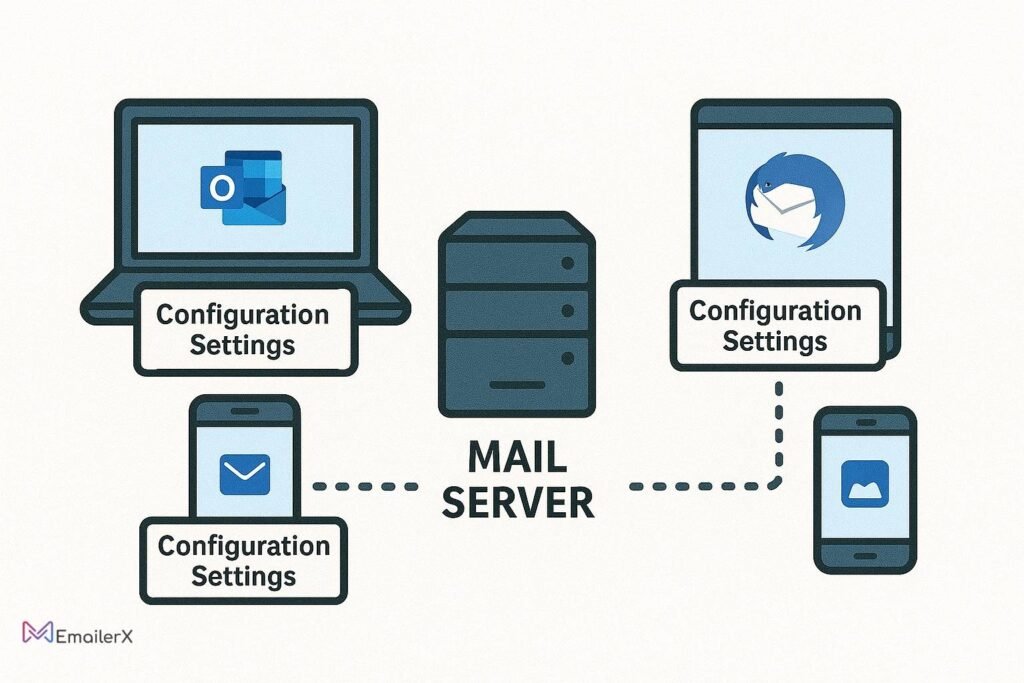
Configure popular email clients for seamless email client integration.
Outlook Configuration
Incoming Mail (IMAP) Settings:
- Server: mail.yourdomain.com
- Port: 993
- Encryption: SSL/TLS
- Authentication: Normal password
Outgoing Mail (SMTP) Settings:
- Server: mail.yourdomain.com
- Port: 587
- Encryption: STARTTLS
- Authentication: Normal password
Thunderbird Setup
IMAP Configuration:
- Server: mail.yourdomain.com
- Port: 993
- Security: SSL/TLS
- Authentication: Normal password
SMTP Configuration:
- Server: mail.yourdomain.com
- Port: 587
- Security: STARTTLS
- Authentication: Normal password
Mobile Device Configuration
For iOS and Android devices:
- IMAP Server: mail.yourdomain.com:993 (SSL)
- SMTP Server: mail.yourdomain.com:587 (STARTTLS)
- Username: Full email address
Password: Account password
Security Best Practices
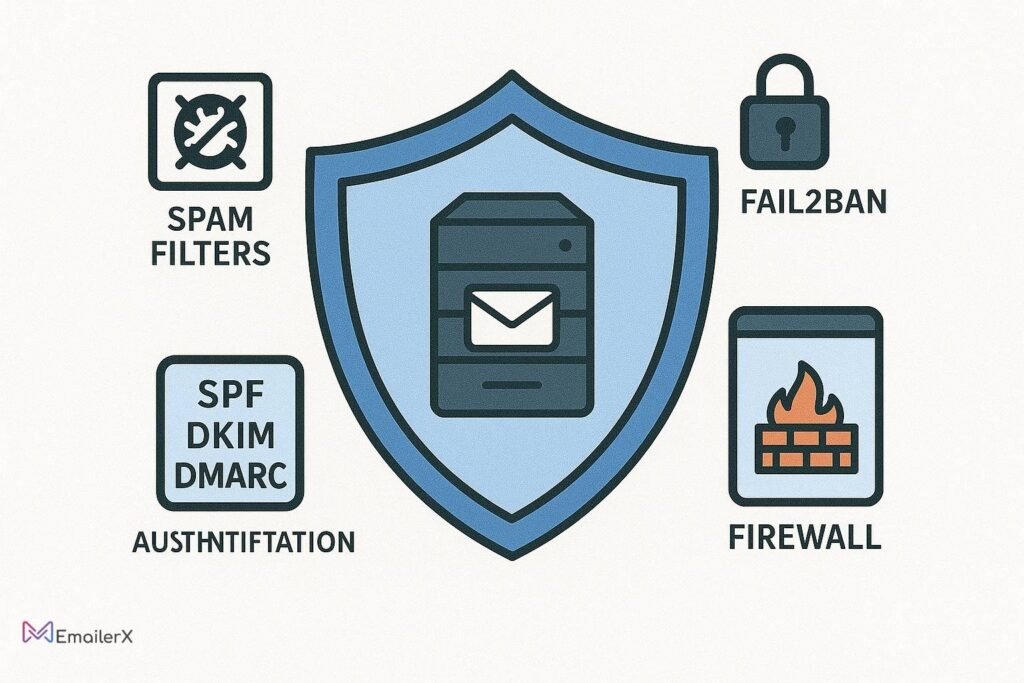
Implementing robust mail server security protects against threats and ensures reliable delivery.
1. Spam Filter Setup
Install and configure SpamAssassin:
bash
# Install SpamAssassin
sudo apt install -y spamassassin spamc

# Configure Postfix integration
sudo nano /etc/postfix/master.cf
Add:
bash
smtp      inet  n       -       y       -       -       smtpd
  -o content_filter=spamassassin

2. Fail2Ban Configuration
bash
# Install Fail2Ban
sudo apt install -y fail2ban

# Configure email-specific jails
sudo nano /etc/fail2ban/jail.local
Add:
bash
[postfix]
enabled = true
port = smtp,465,submission
logpath = /var/log/mail.log

[dovecot]
enabled = true
port = pop3,pop3s,imap,imaps,submission,465,sieve
logpath = /var/log/mail.log

3. Email Authentication Implementation
Ensure proper email authentication with:
SPF: Prevent email spoofing
DKIM: Cryptographic email signing
DMARC: Policy enforcement and reporting

4. Regular Security Updates
bash
# Automated security updates
sudo apt install -y unattended-upgrades
sudo dpkg-reconfigure -plow unattended-upgrades
Advanced Email Server Features
Webmail Integration (Roundcube)
Install Roundcube webmail for browser-based email access:
bash
# Install web server and PHP
sudo apt install -y apache2 php php-mysql php-mbstring php-xml

# Download and configure Roundcube
wget https://github.com/roundcube/roundcubemail/releases/latest/download/roundcubemail-*.tar.gz
sudo tar -xzf roundcubemail-*.tar.gz -C /var/www/html/
Email Monitoring and Backup
Implement backup email server strategies:
bash
# Create backup script
sudo nano /usr/local/bin/email-backup.sh

bash
#!/bin/bash
# Email backup script
rsync -avz /var/mail/vmail/ /backup/email/
mysqldump postfix > /backup/email/postfix-$(date +%Y%m%d).sql
Docker Email Server Setup
For Docker email server deployment, consider using Docker Mailserver:
bash
# Download Docker Mailserver
wget
https://raw.githubusercontent.com/docker-mailserver/docker-mailserver/master/compose.yaml
This approach offers:
- Easy deployment and management
- Container isolation for security
- Simplified updates and maintenance
Scalable architecture for growing businesses
Email Deliverability Optimization
Maximize your email deliverability with these proven strategies:
1. Warm-Up Your IP Address
Start with low email volumes
Gradually increase sending frequency
Monitor reputation scores regularly

2. Maintain Clean Lists
Implement double opt-in processes
Regular list cleaning and validation
Remove inactive subscribers

3. Monitor Blacklists
Use tools like:
MXToolbox: Comprehensive blacklist checking
MultiRBL: Multiple RBL database queries
Postmaster Tools: Google and Microsoft insights

4. Implement Feedback Loops
Set up feedback loops with major ISPs:
Gmail Postmaster Tools
Microsoft JMRP
Yahoo Feedback Loop
Troubleshooting Common Issues

Email Not Sending
Check DNS records configuration
Verify firewall port settings
Test SMTP authentication
Review mail logs: sudo tail -f /var/log/mail.log

Email Not Receiving
Confirm MX record setup
Check Dovecot service status: sudo systemctl status dovecot
Verify mailbox permissions
Test port connectivity: telnet mail.yourdomain.com 993

SSL Certificate Issues
Verify certificate validity: sudo certbot certificates
Check certificate permissions
Restart services after renewal
Update client configurations

Performance Optimization
Monitor server resources: htop
Optimize Postfix queue settings
Configure Dovecot connection limits
Implement log rotation
Conclusion:

Setting up a dedicated email server provides unmatched control, security, and cost-effectiveness for your business communications. While the initial setup requires technical expertise, the long-term benefits of self-hosted email advantages far outweigh the effort invested.
Key takeaways from this guide:
- Complete Privacy Control: Your data stays on your infrastructure
- Professional Branding: Custom domain emails enhance credibility
- Cost Efficiency: Lower long-term expenses compared to hosted solutions
- Unlimited Scalability: Grow without subscription limitations
- Enhanced Security: Implement custom security measures
Frequently Asked Questions
How much does it cost to run your own email server?
Running a self hosted email server typically costs $10-50/month for VPS hosting, plus domain registration fees. This is significantly cheaper than premium hosted email services for multiple users.
Is it difficult to maintain an email server?
With proper initial setup and automated updates, email server management requires minimal daily maintenance. Regular monitoring and security updates are essential but manageable
Can I use cPanel for email configuration?
Yes, cPanel email configuration simplifies management through a web interface. However, manual configuration provides better learning experience and customization options.
What’s the difference between SMTP, IMAP, and POP3?
– SMTP: Sends emails from client to server
– IMAP: Syncs emails across multiple devices
– POP3: Downloads emails to single device
How do I prevent my emails from going to spam?
Implement proper DNS records (SPF, DKIM, DMARC), maintain good sending reputation, use authenticated SMTP, and avoid spam trigger words in content.
Can I migrate from Gmail to my own server?
Yes, you can export Gmail data using Google Takeout and import it to your private email server using IMAP migration tools.
What are the best email server alternatives?
Popular email server alternatives include:
Mailcow: Docker-based solution
Mail-in-a-Box: Automated setup
iRedMail: All-in-one package
Zimbra: Enterprise features
How do I backup my email server?
Implement regular backups of:
– Email data (/var/mail/vmail/)
– Configuration files (/etc/postfix/, /etc/dovecot/)
– Database (if using MySQL/PostgreSQL)
– SSL certificates